The Facebook Pixel is a piece of HTML coding that is copied from Facebook Ad Manager and pasted onto your website header. For most technology-challenged entrepreneurs this is the point where their eyes glaze over. The thought of modifying the code on the back-end of a website is as scary as performing open heart surgery on their child would be. The good news is that if your website is built on WordPress, installation is painless when you use the PixelYourSite plugin.
![]()
WordPress currently powers 30% of the worlds websites (source), and is the hosting platform I recommend most (along with Shopify for eCommerce sites). This article will show you how to install the Facebook Pixel with the Pixel Your Site plug-in.
For pixel installation on WordPress I recommend opening 2 windows: one for your Facebook Ad Manager, and one for your WordPress website.
Window #1: Facebook Ads Manager
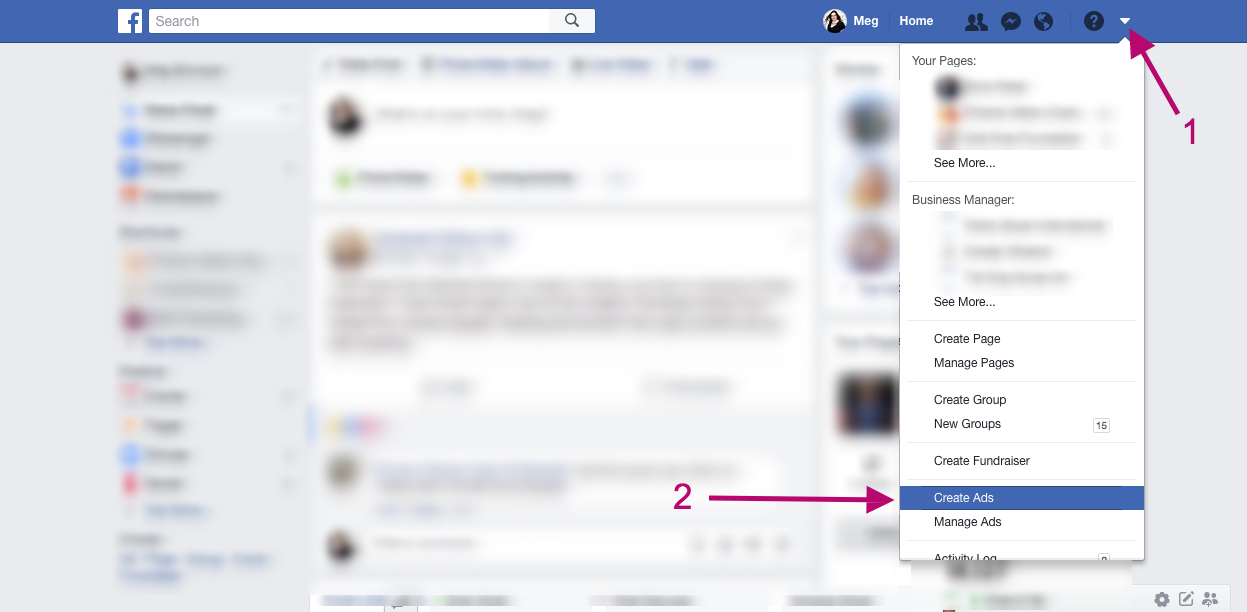
In one window, navigate to your Facebook Ads Manager. You can get there by clicking on the small upside down triangle in the upper right hand corner of the blue tool bar, then clicking on “Create Ads.”
From the Ads Manager, you will now need to navigate to the Pixel dashboard. Click on the main menu (it's 3 parallel lines that kind of look like a hamburger in the upper left hand corner). From here, you will need to hover over “All Tools” in order to expand the full menu and then click on Pixels.
Note: Facebook does make edits quite frequently, so the exact positioning of the Pixels link may be slightly different depending on your version of Ads Manager.
![]()
If you have not created a Pixel yet, you will see the following screen and will be prompted to click the “Create A Pixel” button. From there you will name your Pixel (keeping the default name is fine).
![]()
After creating your Pixel, you'll be brought here – to the Pixel dashboard. To install the Pixel on WordPress using the Pixel Your Site plug-in, you only need to copy the Pixel ID number. This number may range from 6-20 numbers and is found just under the name of the Pixel on the left hand side. You will only need to copy the number.
![]()
Once you have the Pixel ID number copied, keep the window open (just in case) and then open a second window and sign into your WordPress website.
Window #2: Your WordPress.org Website
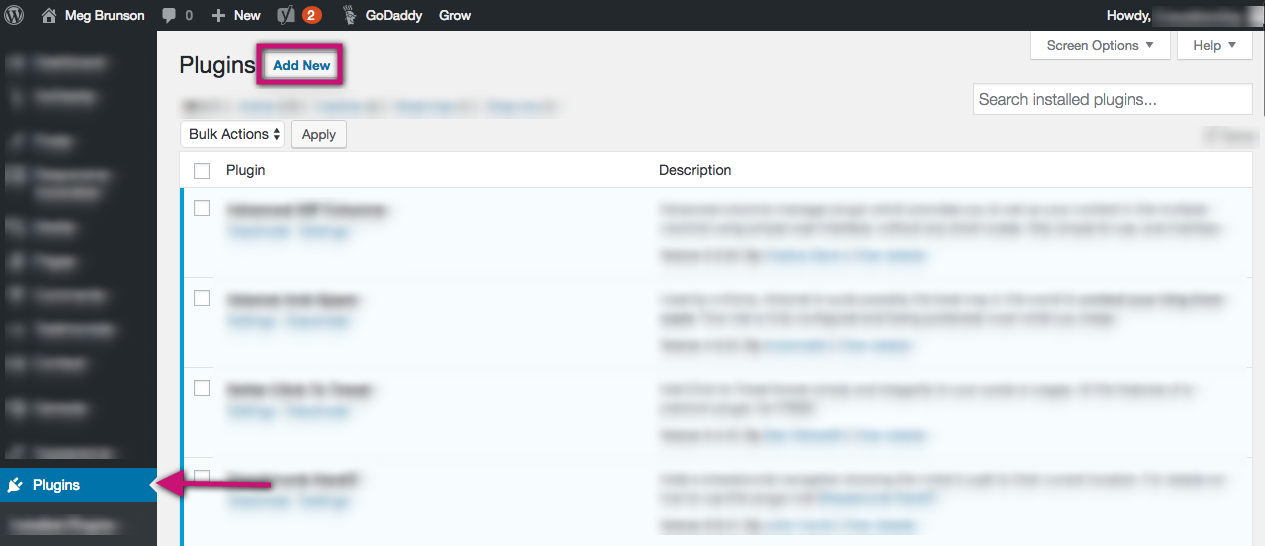
After signing into the back end of your WordPress.org website, navigate to the Plugins tab and click on the button to add a new plugin.
Search for the term “Pixel Your Site” by keyword and then look for the PixelYourSite plug in by PixelYourSite. There are a variety of plugins available, however PixelYourSite is the plug in that was recommended by Facebook employees when I worked at Facebook, and it has historically been updated and maintained regularly, so I trust it above others.
![]()
After you find the correct plugin, click on the “Install Now” button, and then it will change into a blue “Activate Now” button – click that one too! Once the plugin is installed and activated, you can search for it in the dark gray menu bar on the far left. Click on PixelYourSite, and then scroll down a little bit and paste the Pixel ID number into the form field marked “Add Your Facebook Pixel ID.”
![]()
You will then need to scroll down to save the changes – but make sure that the checkbox above the “Save Settings” button is checked to activate the plugin general settings. For some reason, this is often unchecked as a default!
![]()
That's It! Pixel is Installed!
Without any tears, or getting lost in html coding you have successfully installed the base Pixel into your website! WOO HOO!
This is just step one… there are many other cool things you can do with Pixel and they aren't complicated. In the coming weeks, I will show you how to troubleshoot the Pixel installation, set-up custom audiences, and track conversions!